In our previous post we prepared our NodeJS application and pushed our code up to our Git repository. In this post we’ll create a build process to take this application, build and deploy and image to our Azure Container Registry, and deploy a container based on this image to Azure Container Instances.
Create Azure Container Registry
Azure Container Registry allows you to store images in a private Docker registry. ACR is compatible with open-source
Docker Registry v2, which allows you to use familiar Docker CLI tools. Instructions on creating a registry are
below.
Creating VSTS Build Definition
Using a VSTS Build definition we will connect to our Github repository, build an image from our code, publish that
image to our container registry, then deploy that image to Azure Container Instances.
Note: Prior to starting this section you will need to create a VSTS account and project. You can do this at
https://www.visualstudio.com/team-services
. All you need is a Microsoft account (hotmail, live, outlook.com) to get started.
- Navigate to your project in your VSTS subscription.
- Click on “Build & Release” in the top menu
- Once in Build & Release click “+ New definition”
- Alternatively there is a “+ New” button in the top right as well
- Next we have the option to choose a starting template. Type “docker” into the search box and select “Container
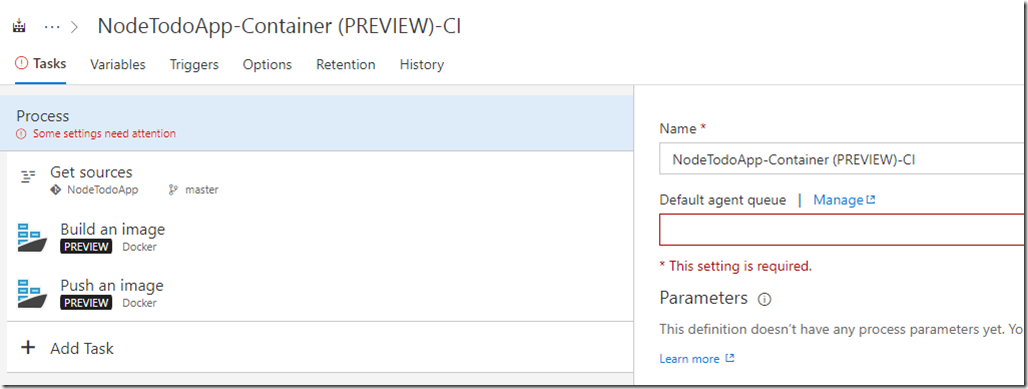
(PREVIEW)” - You should have a build process that looks similar to this
Configure the Build Process
In this section we will outline the steps to configure the build process for getting our code form GitHub, building and
pushing our image, and deploying it to Azure Container Instances. This is what we will do at a high-level:
- Configure source to use GitHub repo
- Configure Docker task to Build an image
- Configure Docker task to Push said image to our Azure Container Registry
- Configure Shell Script Task to run our shell script to install the Azure CLI 2.0 on the Hosted Agent
- Configure Azure CLI Task to run a cli command to delete any existing copies of our container in ACI, then deploy
the new image to ACI.
Edit Name and Select Agent Queue
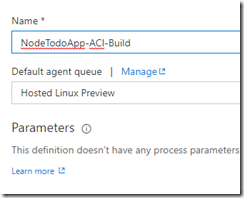
- If the “Process” task is not selected, select it. Feel free to change the name.
Configure GitHub Source
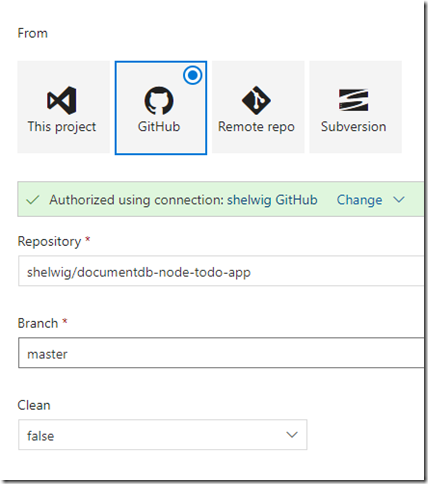
- Select “Get source”
- Choose “GitHub”
- Authorize the connection to your GitHub account
- Once Authorized, Select the desired repository
- Select the desired branch
Configure Image Build Task
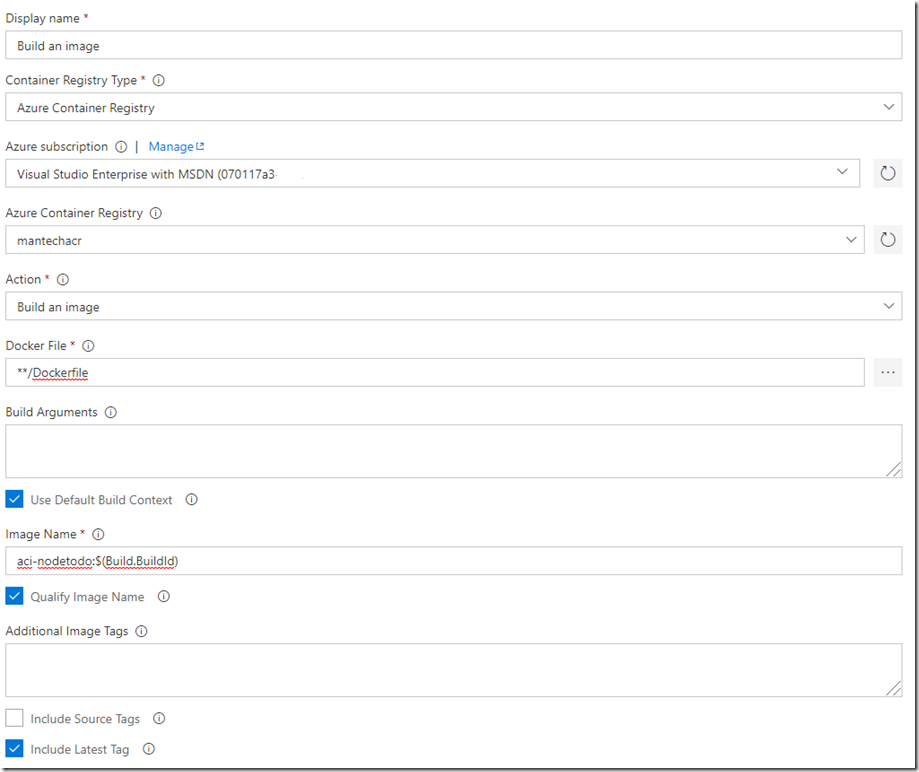
- Select “Build an image” from the Task list
- Set “Container Registry Type” to “Azure Container Registry”
- Select your Azure Subscription
- You may need to configure this if you haven’t done this previously
- Select your desired Azure Container Registry
- Action should be set to “Build an Image”
- Docker File should be set to “**/Dockerfile”
- You can also navigate the directory structure of your project and point directly to the Dockerfile if you
wish
- You can also navigate the directory structure of your project and point directly to the Dockerfile if you
- Check the following:
- Use Default Build Context
- Qualify Image Name
- Include Latest Tag
- For “Image Name” you can leave it default or change it. I changed it to the following {name of project}:$(Build.DuildId)
- Ex: aci-nodetodo:$(Build.BuildId)
Your settings should look similar to this
Configure Image Push Task
These settings should look almost identical to the build task
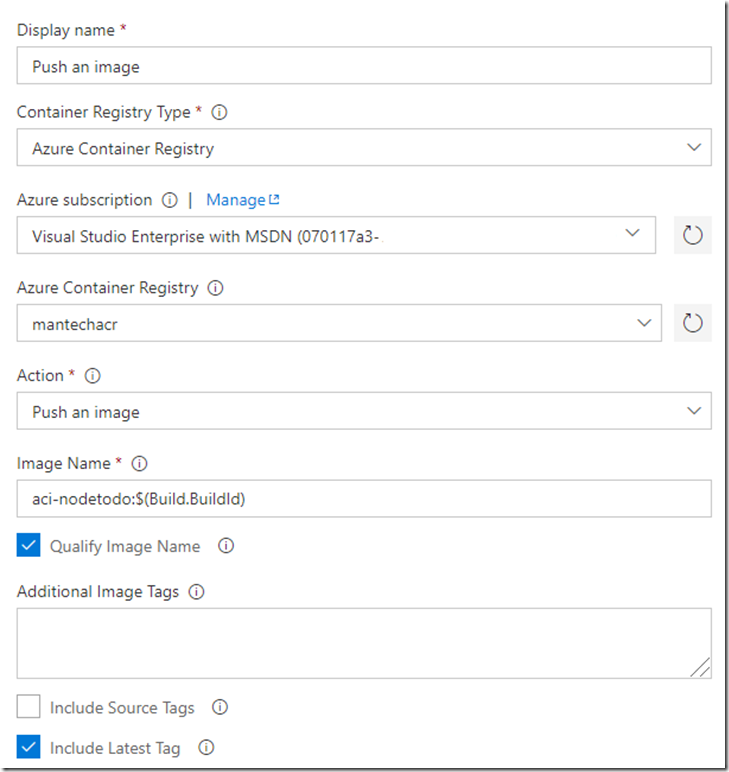
- Select “Push an image” from the Task list
- Set “Container Registry Type” to “Azure Container Registry”
- Select your Azure Subscription
- You may need to configure this if you haven’t done this previously
- Select your desired Azure Container Registry
- Action should be set to “Push an Image”
- Docker File should be set to “**/Dockerfile”
- You can also navigate the directory structure of your project and point directly to the Dockerfile if you
wish
- You can also navigate the directory structure of your project and point directly to the Dockerfile if you
- Check the following:
- Qualify Image Name
- Include Latest Tag
- For “Image Name” you can leave it default or change it. I changed it to the following {name of project}:$(Build.DuildId)
- Ex: aci-nodetodo:$(Build.BuildId)
Your settings should look similar to this
Configure Azure CLI Install Task
We’ll use a Shell Script task to install the Azure CLI onto the hosted agent.
- Select “+ Add Task”
- Search for or find the “Shell Script” task
 and add it to your build process.
 - Change to display name to “Install Azure CLI 2.0”
- Navigate to the scripts path in your directory and select the desired script
Your settings should look similar to this:
Configure Delete Task to Remove Image in Azure Container Instances
Currently there is no way to do an in-place update of a container in Azure Container Instances. This means we’ll need
to delete the existing container prior to deploying a new version of the container. Hopefully this will be resolved
in the very near future and this task will no longer be necessary.
- Select “+ Add Task”
- Search for or find the “Azure CLI Preview” task
- Add this task to the build process
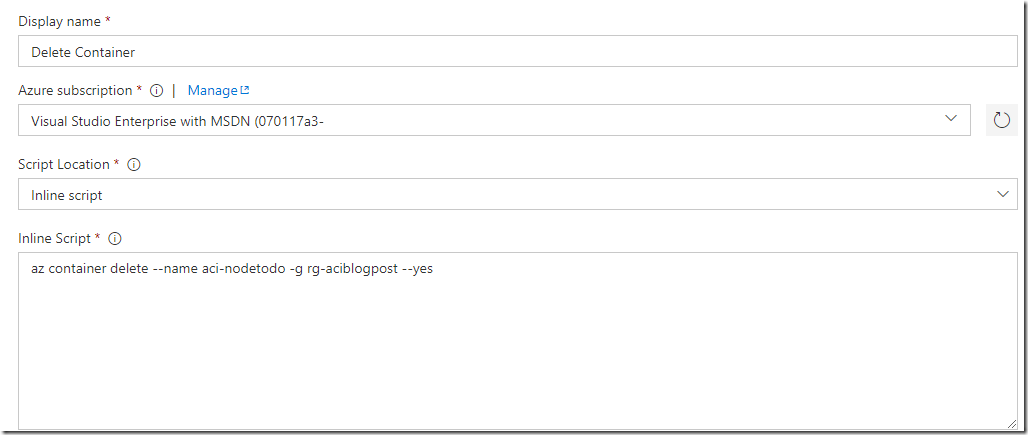
- Change name to “Delete Container”
- Select your Azure Subscription
- For “Script Location” select Inline Script
- Paste the following in the text area for the “Inline Script”
az container delete --name aci-nodetodo -g rg-aciblogpost --yes
You task should look similar to this:
Configure Create Task to Deploy Container to Azure Container Instances
The last step is to deploy a container from an image in our container registry into Azure Container Instances.
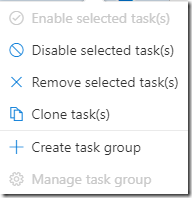
- Clone the “Delete Container” task you created in the preview step. This can be done by right clicking on the task
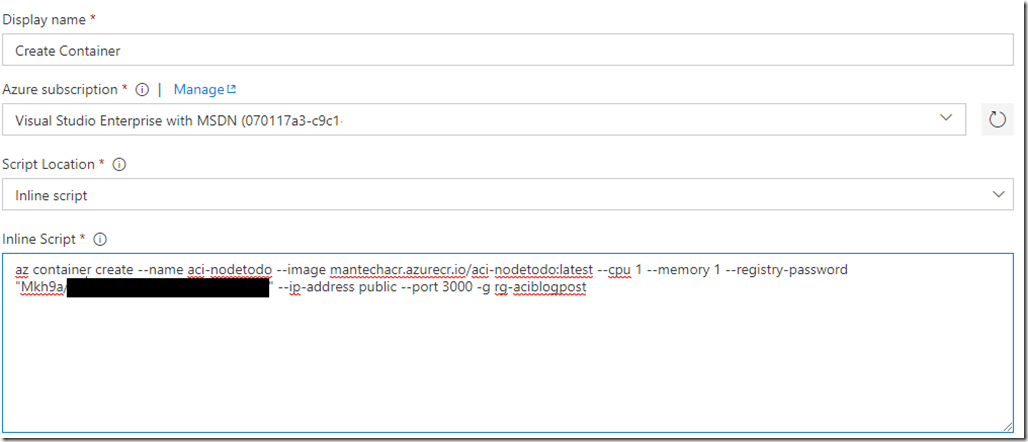
and selecting Clone. - Change name of new task to “Create Container”
- Paste the following code into the “Inline Script” section
az container create --name aci-nodetodo --image mantechacr.azurecr.io/aci-nodetodo:latest --cpu 1 --memory 1 --registry-password "{place password here}" --ip-address public --port 3000 -g rg-aciblogpost
ETC: az container create –name (name of container) –image (url of registry/name of image:version of image) –cpu 1 –memory 1 –registry-password (password to your container registry) –ip-address public –port 3000 (port number your application exposes on) –g (resource group to deploy your container instance into)
Your task should now look similar to this:
Save and Queue Build
Once all tasks have been properly configured it’s time to save and queue the build.
- In the top right hand corner of the Task edit screen there is a button to “Save & queue” a new Build. Select this option.
- Click “Queue”
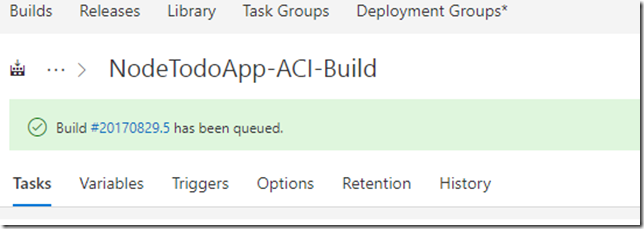
- Once queued a green bar will appear at the top of the Task Edit screen with a link to the current build. Click this link.
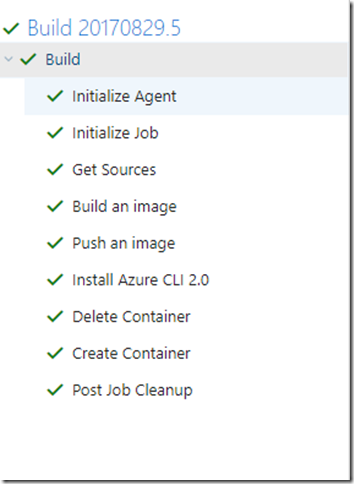
- Monitor the Build and validate that all tasks complete successfully.
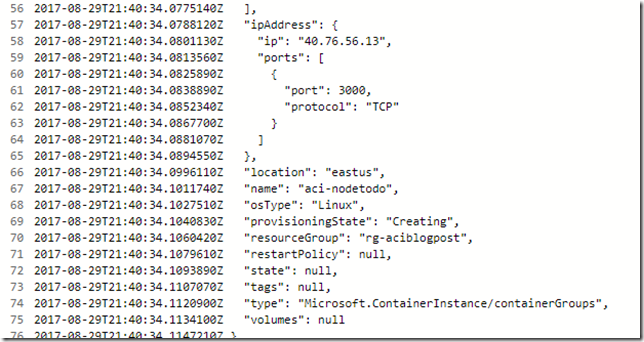
- Click on the “Create Container” task
- View the logs and find the “ipAddress” property for the output
- Copy the IP Address and combine it with the port number
- Paste URL into browser and test the application is functioning
NOTE: At times I have noticed a 1 minute delay when deploying an application on something other than port 80. If the application is unresponsive when you first deploy it, give it a couple minutes and try again.
Wrapping Up
At this point you should have a functioning build process that takes you from local development to deployment using VSTS, Azure Container Registry, and Azure Container Instances. The great thing about this process is you can leverage it as a starting point to deploy to other Azure resources like Azure Web Apps on Linux or Azure Container Services.
Let me know if you have any questions or comment on twitter @imtooold4this
EXTRAS
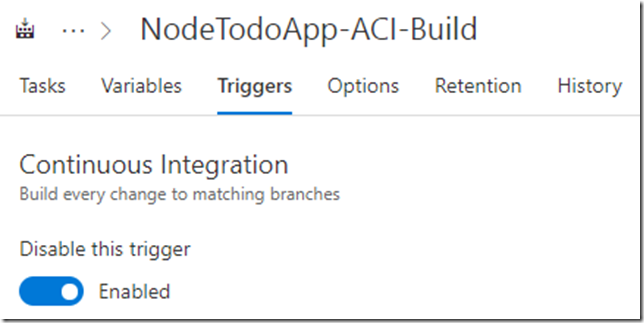
VSTS gives you the ability to have a build execution kick off every time your code branch receives a change. You can enable this Continuous Integration trigger under the “Triggers” tab of your Build Process.

