If you work for a large organization and have access to create resources in the cloud, then you are most likely beset with some trepidation around cost overruns. It’s easy to switch to a new task and forget about that massive VM you spun up to test something, or the Hadoop cluster you meant to use. In Azure there are a few ways to schedule certain resources to shut off, but one of the best ways is using Azure Automation.
Azure Automation allows you to create graphical or script based Runbooks to execute tasks in Azure. In previous years, setting up unattended Runbooks required Administrative Access to the Subscription Active Directory to create a Service Principal. However, with the addition of Run As Accounts, you can easily configure a Run As Account and get a ready made Service Principal to use in your Runbook scripts. Below I will show you how to create a Standalone Automation Account or a Automation & Control Account, provision a Run As Account to an existing Automation Account, and write and schedule a script to shut down all your VMs every night.
Setup Run As Account – New Deployment
-
Login to the Azure Portal and Select New
-
If you haven’t already created an Automation Account instructions can be found here. While you can still create a standalone Automation Accounts the recommendation is to create Automation & Control accounts that tie in Log Analytics
- Create Automation & Control Account- https://docs.microsoft.com/en-us/azure/automation/automation-offering-get-started
- Create Standalone Automation Account – https://docs.microsoft.com/en-us/azure/automation/automation-create-standalone-account
-
- Type Automation
- Create either a new (Standalone) Automation Account or an Automation & Control account

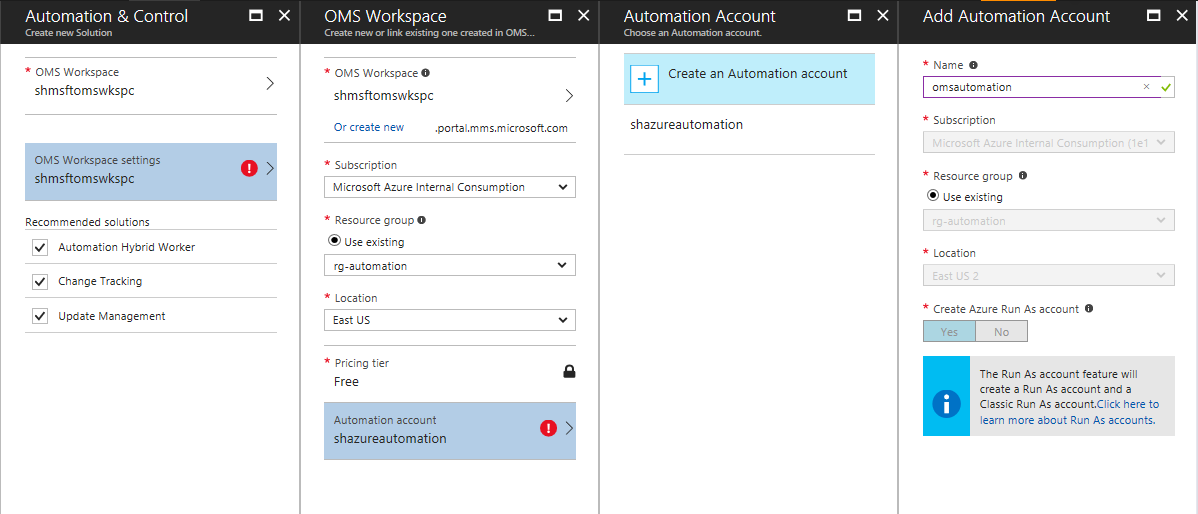
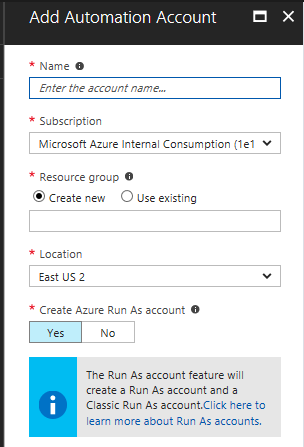
- During the setup process for both you will have to create an Automation account, at which time you can select the option to create a Run As Account
Automation & Control Account Creation
Standalone Account Creation
Setup Run As Account – Existing Deployment
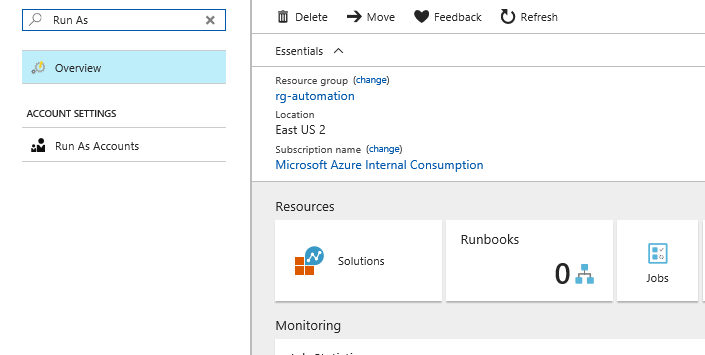
- Navigate to your existing Automation Account
- Search for “Run As”
- Select “Run As Account”
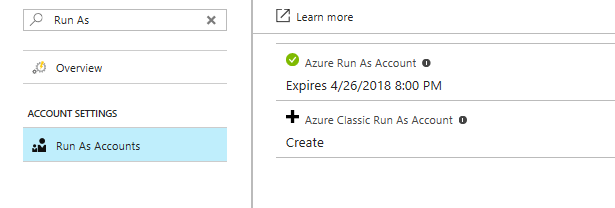
- Select “+ Azure Run As Account”
- Click “Create”
Create Variable with Subscription Id
- Navigate to the Subscriptions area in Azure and copy the Subscription ID for the Subscription your Automation Account was deployed in.
- Navigate back to your Automation Account
- Select “Assets”
- Select “Variables”
- Select “+ Add a variable”
- Create a new variable of type String for your Subscription Id
- Copy the Name of the variable you just created and save for later
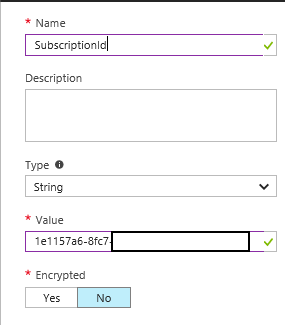
Create Runbook to Stop All VMs
- After account creation Navigate to newly created account.
- Select Runbooks
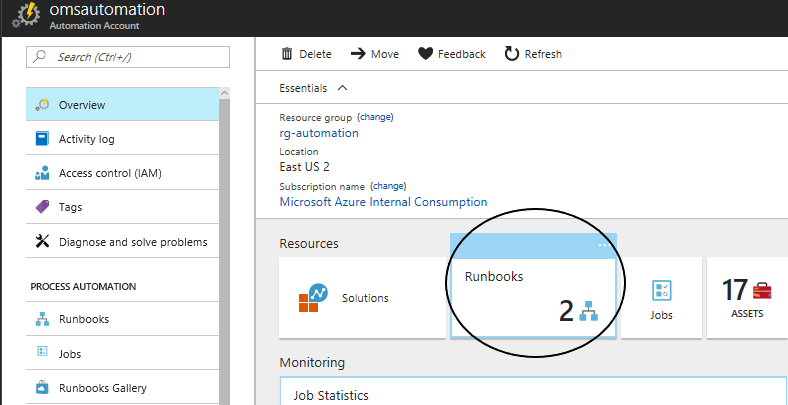
- Click “+ Add a runbook”
- Click “Create a new runbook”
- Enter a name
- For Runbook type select “Powershell”
- Enter a description (optional)
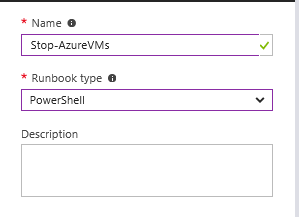
-
In the edit window paste the following code:
- Make Sure to Paste in the name of the SubscriptionId Variable you created in the previous step.
- The following code will get your RunAsAccount from your Subscription, sign into Azure using the service principal, then loop through all resource groups and shutdown any running VMs.
# Create variables and get AutomationRunAsAccount
$SubscriptionId = Get-AutomationVariable -Name '{Paste in name of SubscriptionId Variable Here!!!}'
$connectionName = "AzureRunAsConnection"
$servicePrincipalConnection = Get-AutomationConnection -Name $connectionName

"Signing in to Azure"
Add-AzureRmAccount `
 -ServicePrincipal `
 -TenantId $servicePrincipalConnection.TenantId `
 -ApplicationId $servicePrincipalConnection.ApplicationId `
 -CertificateThumbprint $servicePrincipalConnection.CertificateThumbprint

"Setting context to a specific subscription"
Set-AzureRmContext -SubscriptionId $SubscriptionId

<# # # Now the actual work begins # #>

"Getting the resource groups in this subscription..."
$RGs = Get-AzureRMResourceGroup
write-output $RGs
foreach($RG in $RGs)
{
	"Get VMs in resoure group"
    $VMs = Get-AzureRmVM -ResourceGroupName $RG.ResourceGroupName
    "Loop through all VMs"
	foreach($VM in $VMs)
    {
        $VMDetail = Get-AzureRmVM -ResourceGroupName $RG.ResourceGroupName -Name $VM.Name -Status
        foreach ($VMStatus in $VMDetail.Statuses)
        {
            if($VMStatus.Code.CompareTo("PowerState/running") -eq 0)
            {
				write-output "Stopping VM " $VM.Name
                write-output $VM.Name $VMStatus.Code
                $VM | Stop-AzureRmVm -Force
            }
        }
    }
}

"Done."
- Click “Save” then “Test pane” to verify the script runs properly.
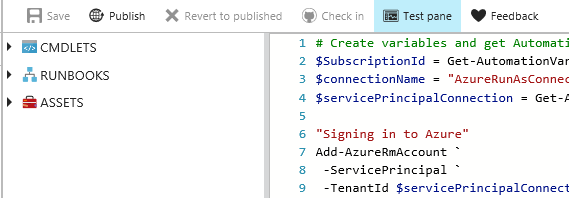
- Click “Start” to start testing your script. (WARNING: This will shutdown all running VMs in your Subscription)


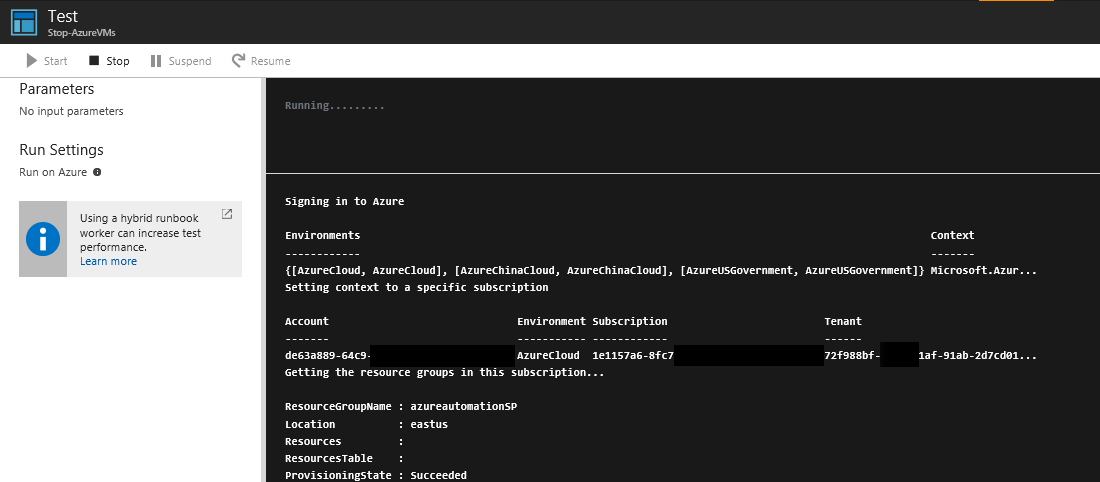
- If job runs successfully, Close Test Pane and click Publish.
Schedule your Automation Job
- Navigate to your Automation Account and to your newly created Runbook
- Click Schedules
- Click “Add a schedule”
- Create a New schedule for running your jobs on a recurring schedule
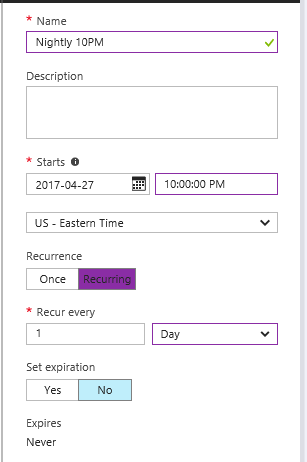
- Once save your Runbook will run each night at 10PM.
Wrap Up
Managing costs in Azure, whether on your dime or the companies, can be a challenge. Setting up some simple Automation Jobs when creating a new subscription can save you a lot of headache and coinage.
Extra Notes
The following part of the script you can reuse to authenticate in all your scripts
# Create variables and get Automation RunAsAccount
$SubscriptionId = Get-AutomationVariable -Name ‘{Paste in name of SubscriptionId Variable Here!!!}'
$connectionName = "AzureRunAsConnection"
$servicePrincipalConnection = Get-AutomationConnection -Name $connectionName

"Signing in to Azure"
Add-AzureRmAccount `
 -ServicePrincipal `
 -TenantId $servicePrincipalConnection.TenantId `
 -ApplicationId $servicePrincipalConnection.ApplicationId `
 -CertificateThumbprint $servicePrincipalConnection.CertificateThumbprint

"Setting context to a specific subscription"
Set-AzureRmContext -SubscriptionId $SubscriptionId